Get started
About the Custom Module
In this tutorial, you'll learn the fundamental concepts of Zodiac modules while you build a super-simple example of a Custom Module. We will deploy it first on a local test environment to control a mock Gnosis Safe, then later use it to control a real Gnosis Safe on a public test network.
If you need support or have questions about this tutorial or Zodiac, join the Gnosis Guild Discord.
Set up IDE
For this tutorial, we'll make use of Remix, a powerful web-based integrated development environment (IDE) for building Ethereum applications. However, these instructions should port easily to whichever developer environment you prefer.
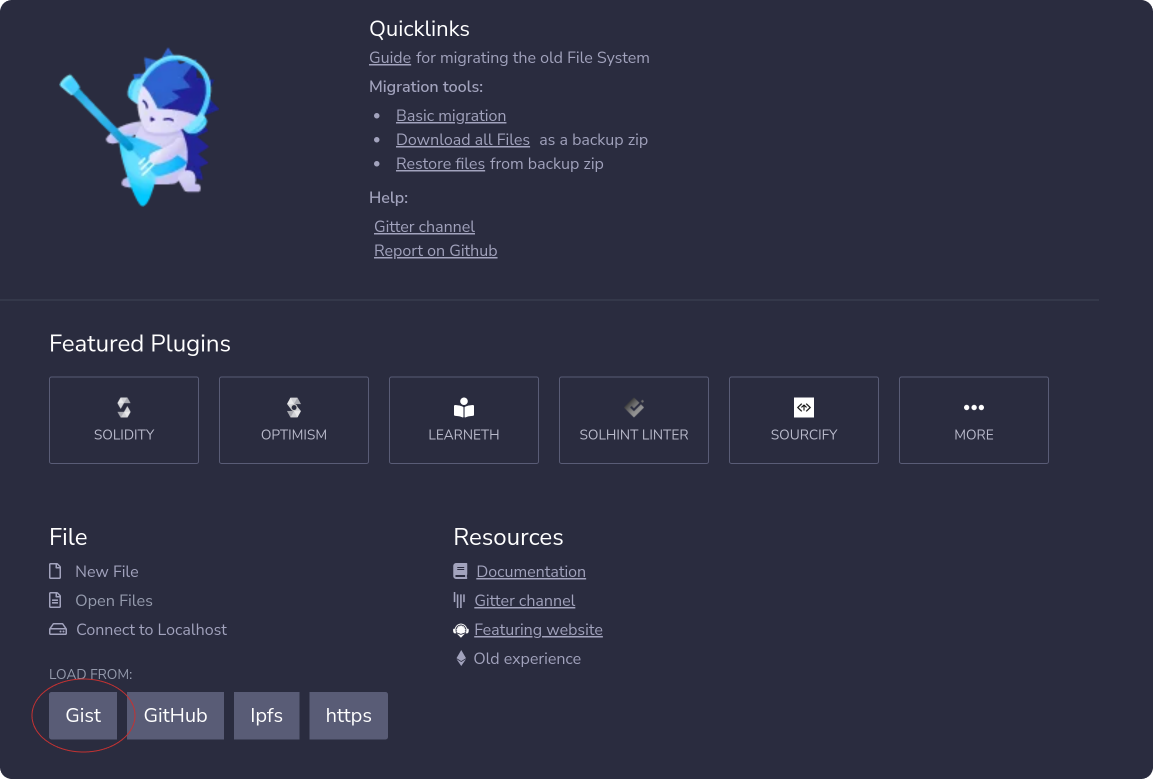
Start by importing this gist.
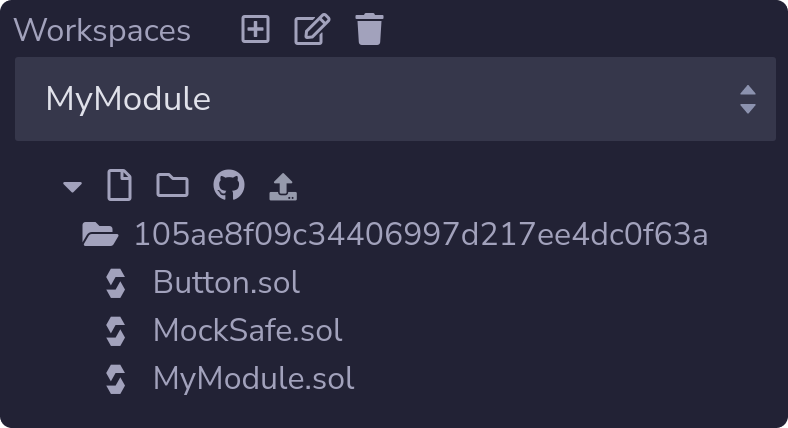
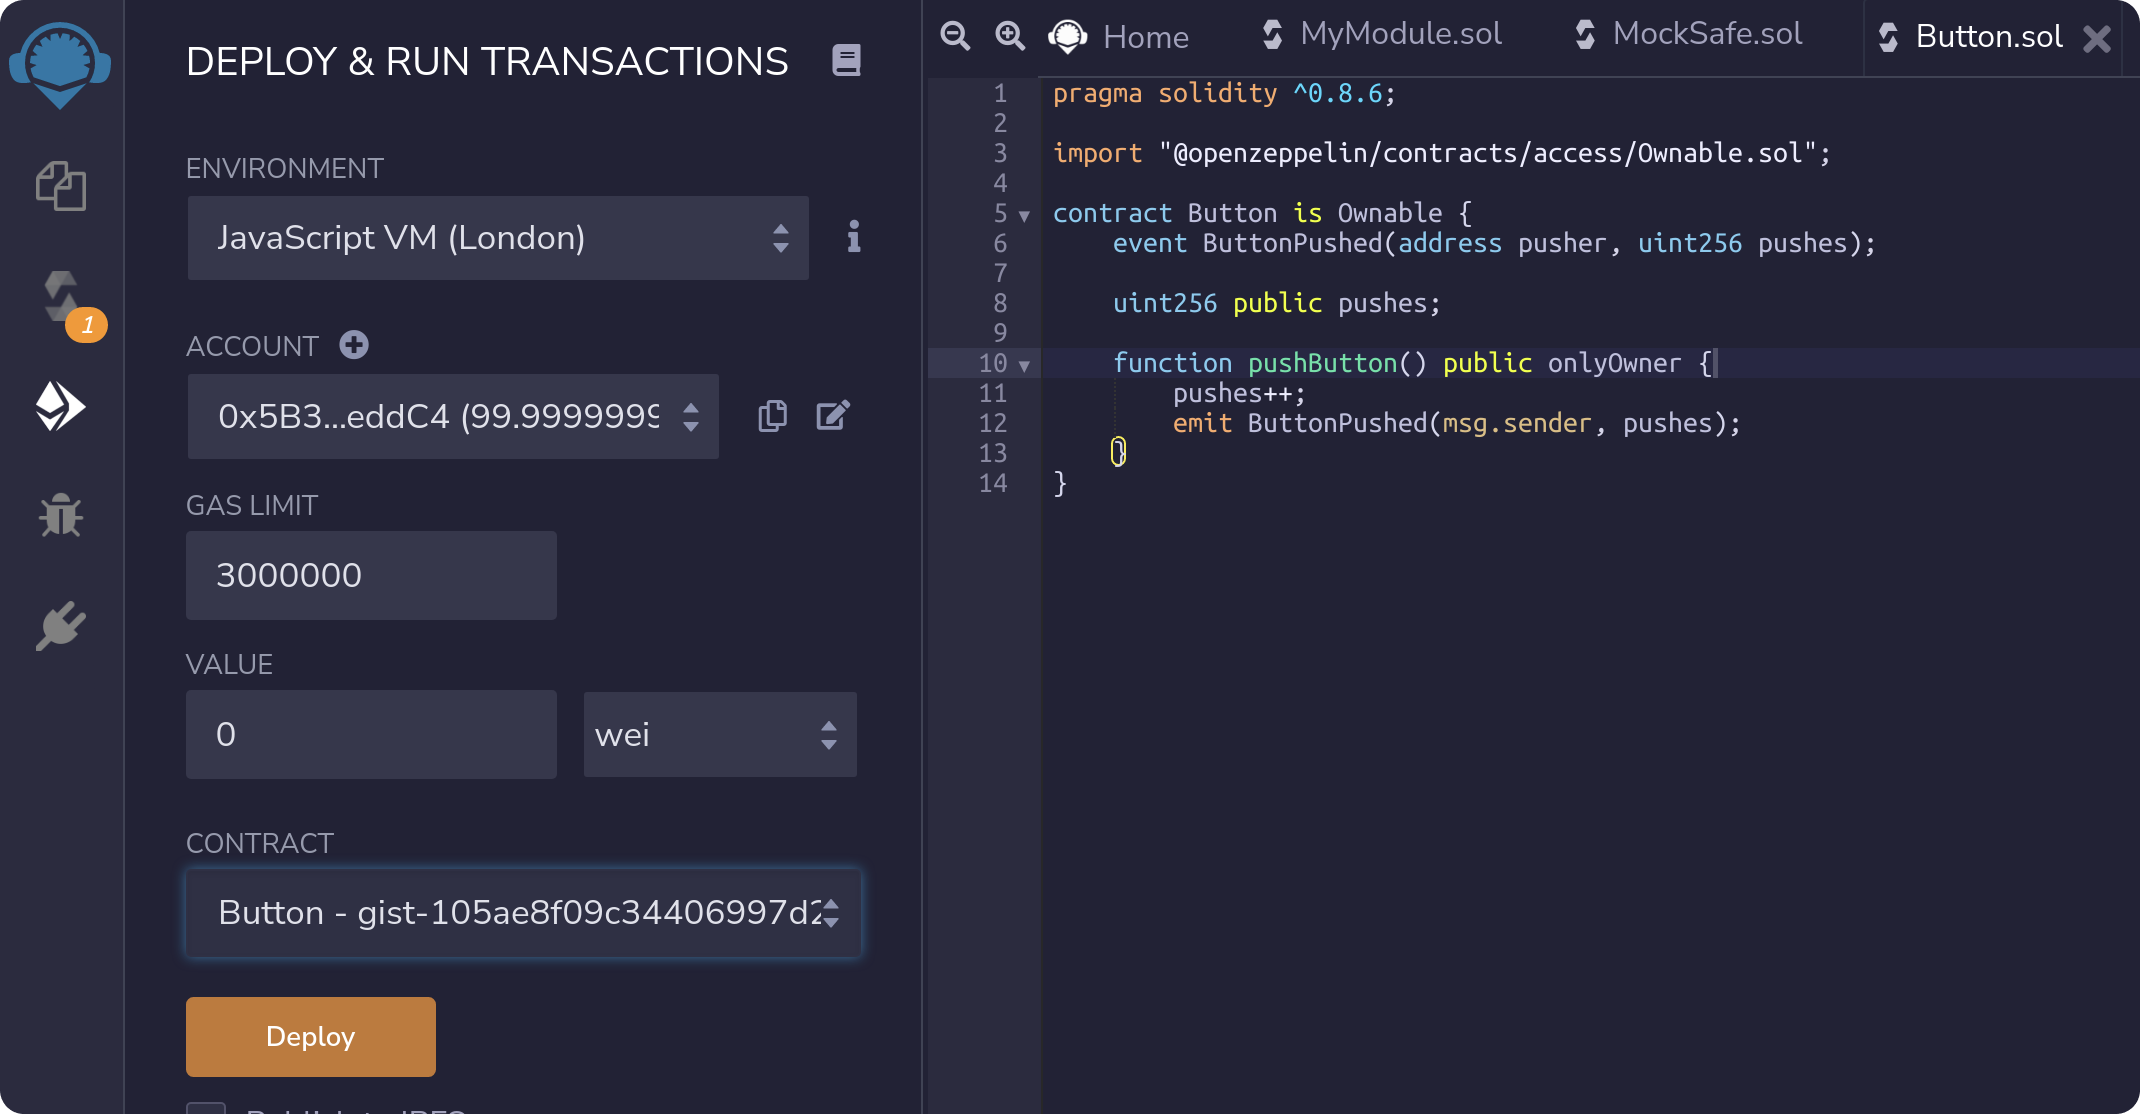
This will add three files to your working directory: Button.sol, MockSafe.sol, and MyModule.sol.
Alternatively, you can create each of the files manually and copy the code from the gist.
Button.solis a contract with one function,pushButton(), which increments a counter,pushes. ThepushButton()function is only callable by the contract's "owner", which will be our Gnosis Safe.
MockSafe.solis a mock of the Gnosis Safe that we'll use for simplicity as we build and test in our local environment. Later, we'll replace it with a real Gnosis Safe on a public test network to ensure our module works.
MyModule.solis where you'll be adding your own code to control the Gnosis Safes and make it push the button in ourButton.solcontract.
Deploy Button and MockSafe
Before writing any of our own code, we should deploy our Button and MockSafe contracts to our local environment.
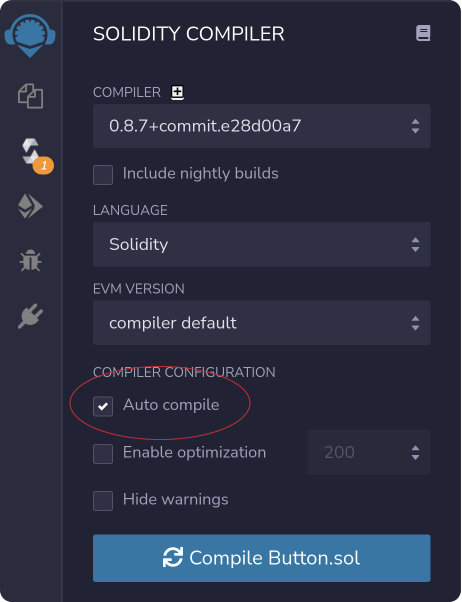
Navigate to the "Solidity Compiler" tab and check "Auto compile". This will re-compile your contract each time you make a change.
With Button.sol open, navigate to the "Deploy & Run Transactions" tab, select "Button" from the contracts dropdown, and hit "deploy". Repeat these steps for MockSafe.sol.
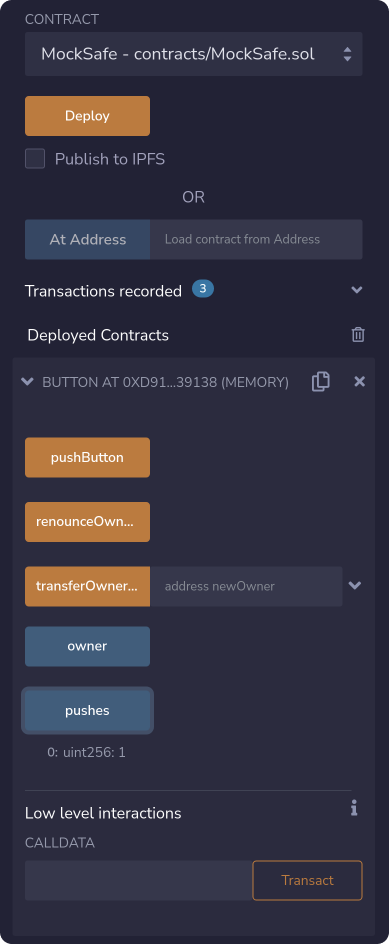
You will now see that two items have appeared in the "deployed contracts" section slightly below the deploy button, one each for Button.sol and MockSafe.sol. You can expand the view of either by clicking the carat to the left of the name, exposing the variables and functions for the contract.
Test that your button works by clicking on the "pushes" button on your deployed Button. It should return 0. Next, click the "pushButton" button and then the "pushes" button again. This time it should return 1.
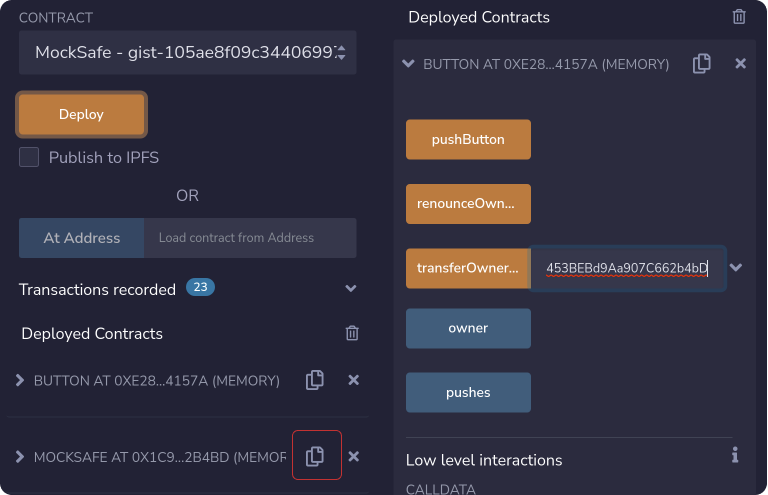
Copy the address of your MockSafe, expand your deployed Button, and call the transferOwnership() function, pasting in your MockSafe's address for the parameter.
Now that you've transferred ownership, clicking the "pushButton" button on your Button will now fail. You'll instead need your MockSafe to execute the transaction.
Expand your MockSafe and call the exec function with the following parameters:
- to:
{address of your deployed Button contract} - value:
0 - data:
"0x0a007972"(the ABI encoded function signature for thepushButton()function)
Clicking the "pushes" button on your Button should now show that pushes has been incremented again.
You're all set up now! Let's start building. 🎉
Build Your Module
What is a module?
By default, Gnosis Safes operate as multisig wallets, requiring confirmation from n of m signers in order to execute transactions. However, in addition to (or instead of) using the multisig logic, you can enable "modules" on your Gnosis Safe. Modules are simply addresses that are allowed to bypass the normal multisig logic by calling special functions, execTransactionFromModule() or execTransactionFromModuleReturnData().
Earlier, you deployed and set up a Mock Safe and a Button that can only be pushed by the Mock Safe.
Now we'll create a Module that can trigger the Mock Safe to push the Button.
Import Module.sol
First and foremost, Zodiac is a philosophy for building composable DAO tooling. To make it easier on aspiring module developers, we've built a library of tools that you can import into your own contracts to help ensure your modules are Zodiac compatible and to reduce the amount of time and effort required for implementation.
Simply import Module.sol from the Zodiac library and add whatever logic your module needs.
pragma solidity ^0.8.6;
import "@gnosis.pm/zodiac/contracts/core/Module.sol";
contract MyModule is Module {
/// insert your code here
}
In our case, we want to add a function to tell our Safe to push the button.
Define an address button variable and add a pushButton function to your contract that calls the exec() function from Module.sol.
exec() will call the execTransactionFromModule() function on the connected Safe. It has four parameters:
- to: the address that the Safe will call. The Button contract in our case.
- value: the amount of ETH in wei that should be sent with the transaction. This is zero in our case.
- data: the ABI-encoded transaction data for the Safe's transaction. In our case, this is the function selector for the
pushButton()function. - operation: defines whether the transaction should be a call or a delegate call. In our case, we'll just do a call.
address public button;
function pushButton() external {
exec(
button,
0,
abi.encodePacked(bytes4(keccak256("pushButton()"))),
Enum.Operation.Call
);
}
That's essentially it! The bulk of your work in creating a module is defining the conditions under which exec() can be called.
Factory Friendly
Wait, I'm still seeing compiler errors.
Module.sol provides another convenience feature to enable any module to be compatible with our ModuleProxyFactory and the Zodiac Safe App. This makes it easier to streamline deployment and set up modules. For example, we can do things like batch deployment of a Safe, its modules, and the calls to enable the modules into one Ethereum transaction. 🤯
Before our contract will compile, you'll need to add a constructor and a setup function. The constructor is a function that is automatically called once when the contract is deployed; it is typically used to initialize the contract. Notice that our constructor simply ABI encodes the parameters that were passed in and then calls the setUp() function. This gives users the option to deploy the module directly or deploy using the ModuleProxyFactory.
constructor(address _owner, address _button) {
bytes memory initializeParams = abi.encode(_owner, _button);
setUp(initializeParams);
}
/// @dev Initialize function, will be triggered when a new proxy is deployed
/// @param initializeParams Parameters of initialization encoded
function setUp(bytes memory initializeParams) public override initializer {
__Ownable_init();
(address _owner, address _button) = abi.decode(initializeParams, (address, address));
button = _button;
setAvatar(_owner);
setTarget(_owner);
transferOwnership(_owner);
}
Our setUp() function will set the button address, then avatar, target, and owner will all be set to the same address. This is true in most cases, but there are subtle distinctions between the three that sometimes require different addresses.
- Avatar is the Safe, the Address that will ultimately execute the transaction passed by the module.
- Target is the address that this module will call
execTransactionFromModule()on. In most cases, this will be the Safe, but in some cases, it could be a special kind of module called a modifier that sits between a module and an avatar and modifies the transactions passed to it in some way. - Owner is the address that has permissions to call
OnlyOwner()functions on the module.
In case your MyModule.sol is still not compiled, here's one we baked earlier.
Deploy Your Module
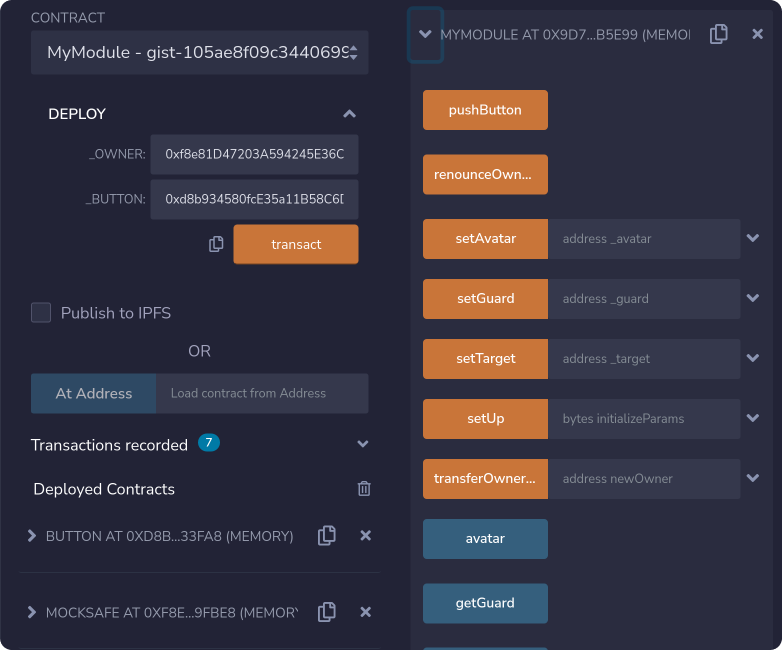
Now that your module is compiling, it's time to deploy it on your local test environment.
- For the
ownerparameter, use the address of your previously deployedMockSafe - For the
buttonparameter, use the address of your previously deployedButton
Once it's deployed, you can expand it to see your pushButton() function, along with a handful of other functions and variables imported from Module.sol.
Safes must explicitly enable addresses as modules to give them access to the execTransactionFromModule() function. So, before your pushButton function will work, you'll need to enable your module on your Safe by calling the enableModule() function.
Note: a real Gnosis Safe can have multiple modules enabled at once, but our Mock Safe can have only one.
Push the button!
Now for the moment of truth. Click the pushButton() function on your deployed MyModule and then click pushes to see the glorious fruits of your labor.
Go ahead, click it a few more times. You've earned it.
Make sure to try pushing the button directly in the button contract to confirm that it fails unless it is called by the Safe.
Now you're ready to do this on a real Gnosis Safe!
Deploy To Rinkeby
Create a Safe
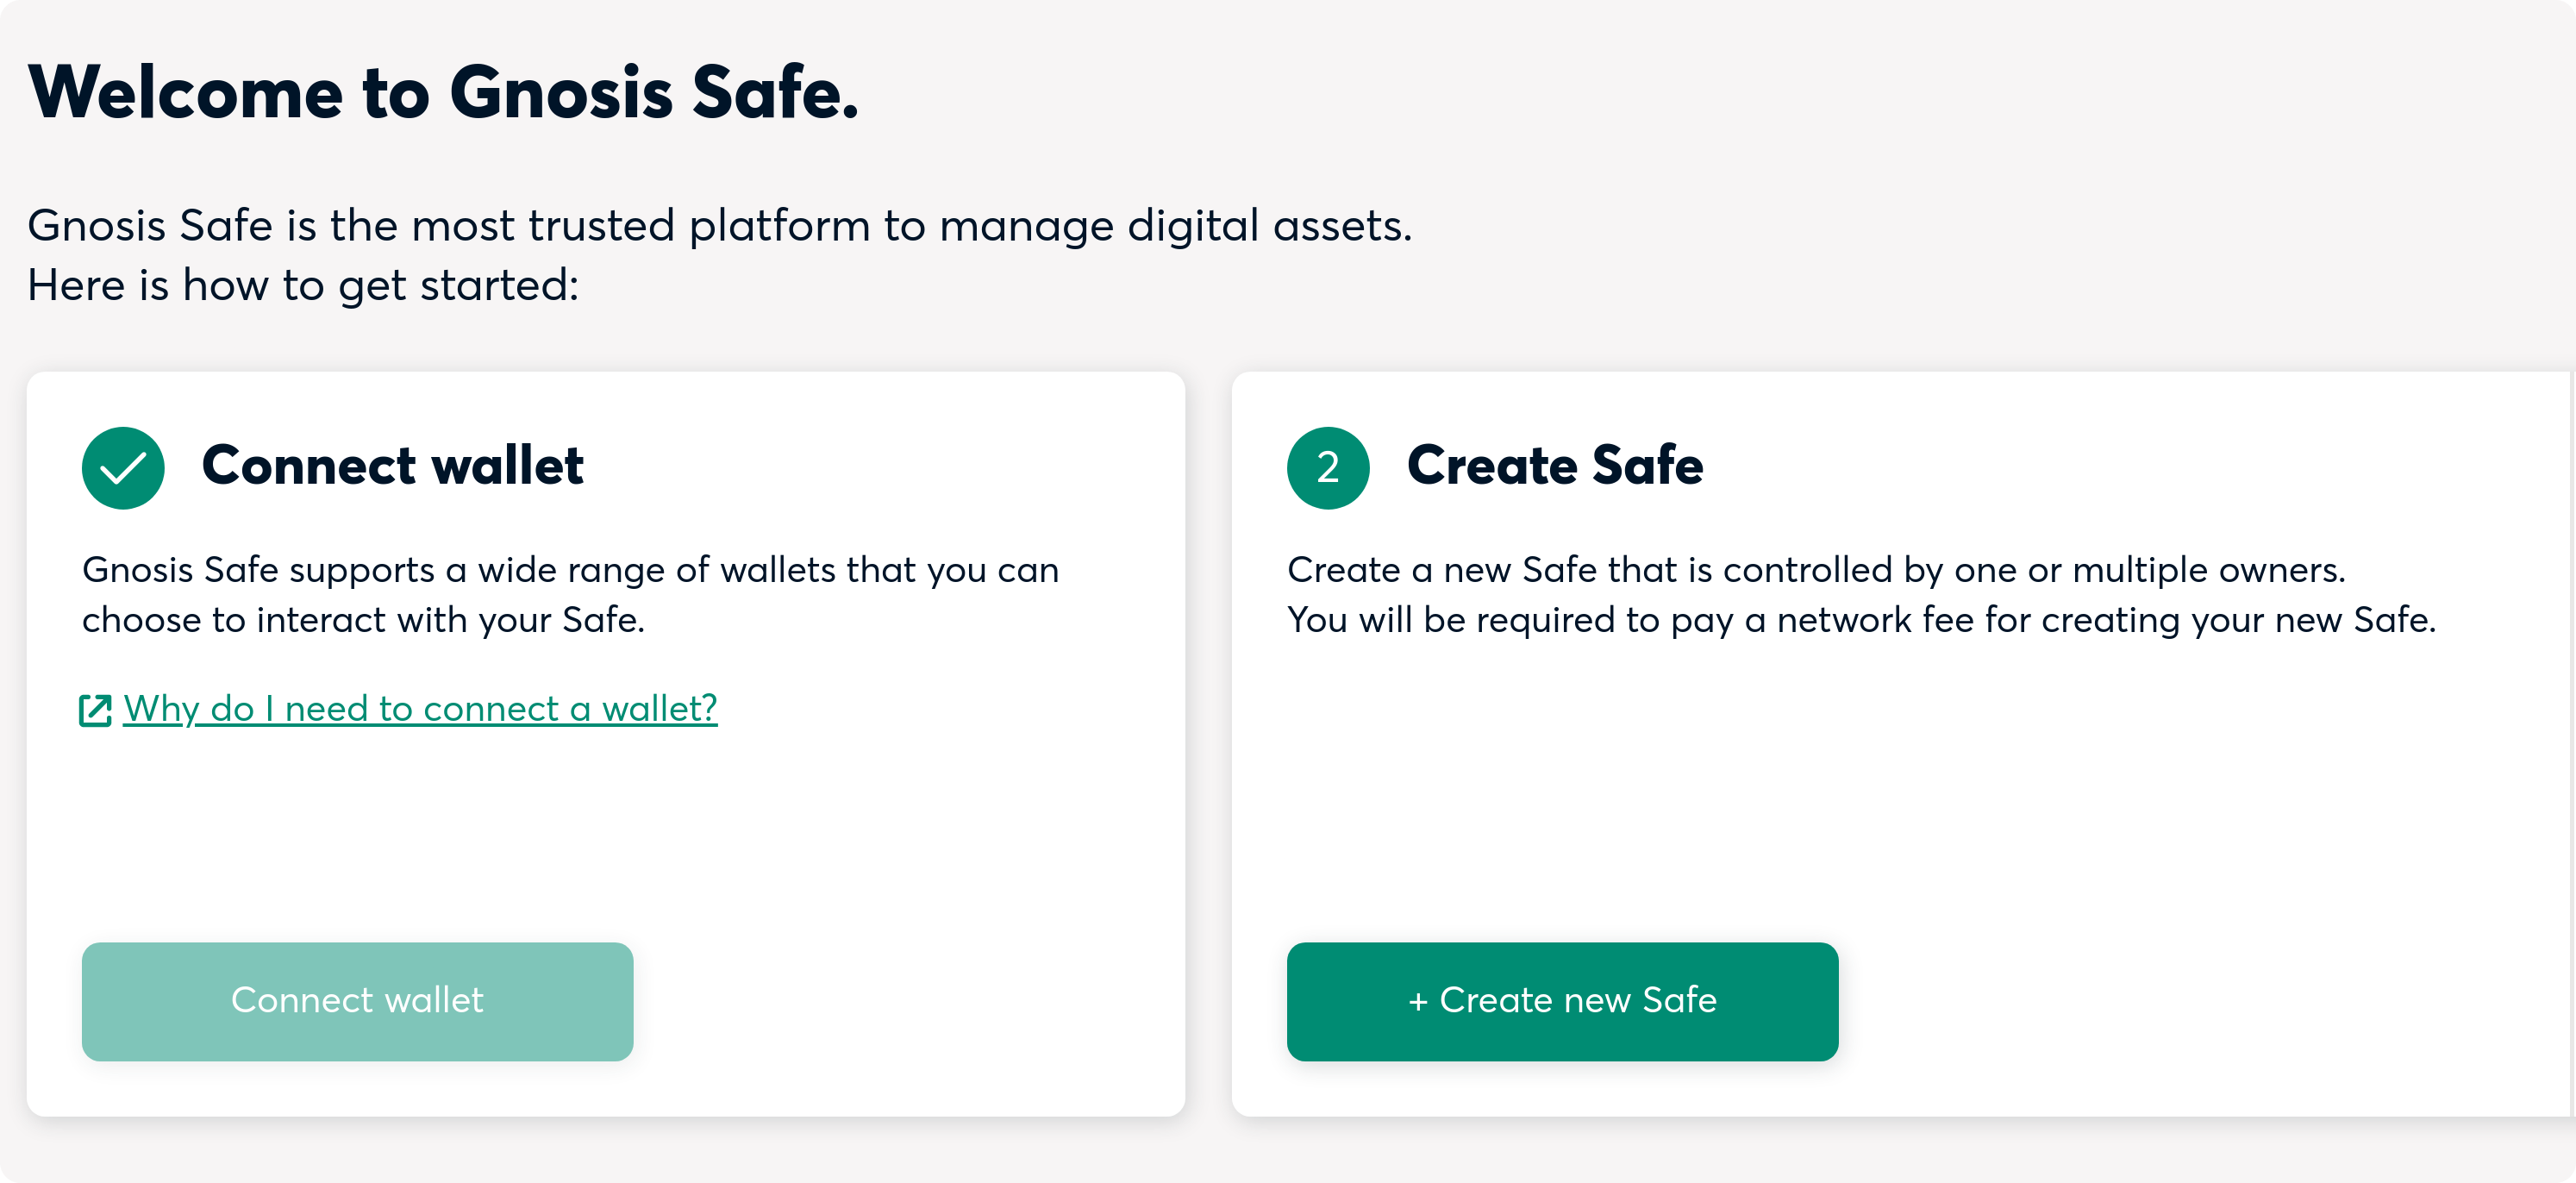
Navigate to rinkeby.gnosis-safe.io/app/ and create a new Gnosis Safe.
Deploy your Button and Module
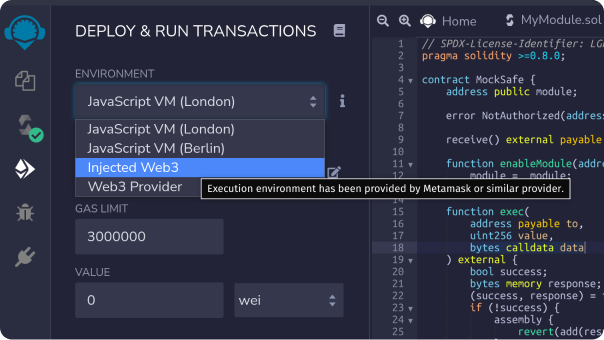
Return to Remix and change your provider to "injected web3" to connect to MetaMask. Make sure your MetaMask is connected to Rinkeby.
Deploy your Button contract and set its owner to your newly created Safe's address. Make sure you have Button.sol opened, otherwise it will not show up in the "Deploy and Run Transactions" tab.
Deploy your MyModule using your newly created Safe's address for the _owner parameter and your newly deployed Button contract's address for the _button parameter. Make sure you have MyModule.sol opened, otherwise it will not show up in the "Deploy and Run Transactions" tab.
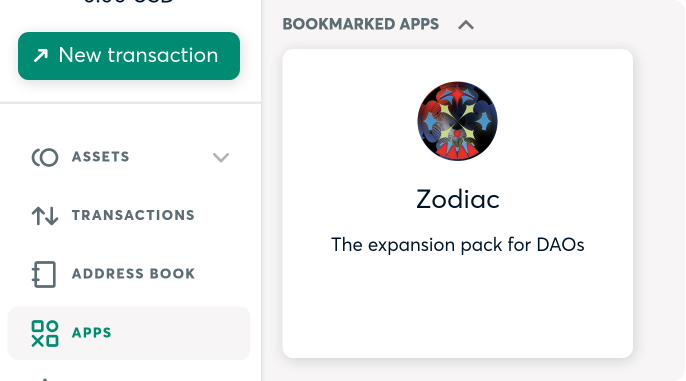
In the Gnosis Safe app, navigate to the APPS tab and select the Zodiac Safe App.
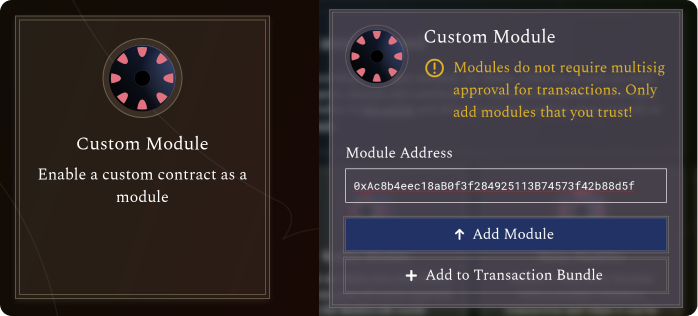
Select "custom module", enter the address of your newly deployed module, and click "Add Module".
Once the transaction confirms, your new module should show up in your list of enabled modules.
Verify on Etherscan
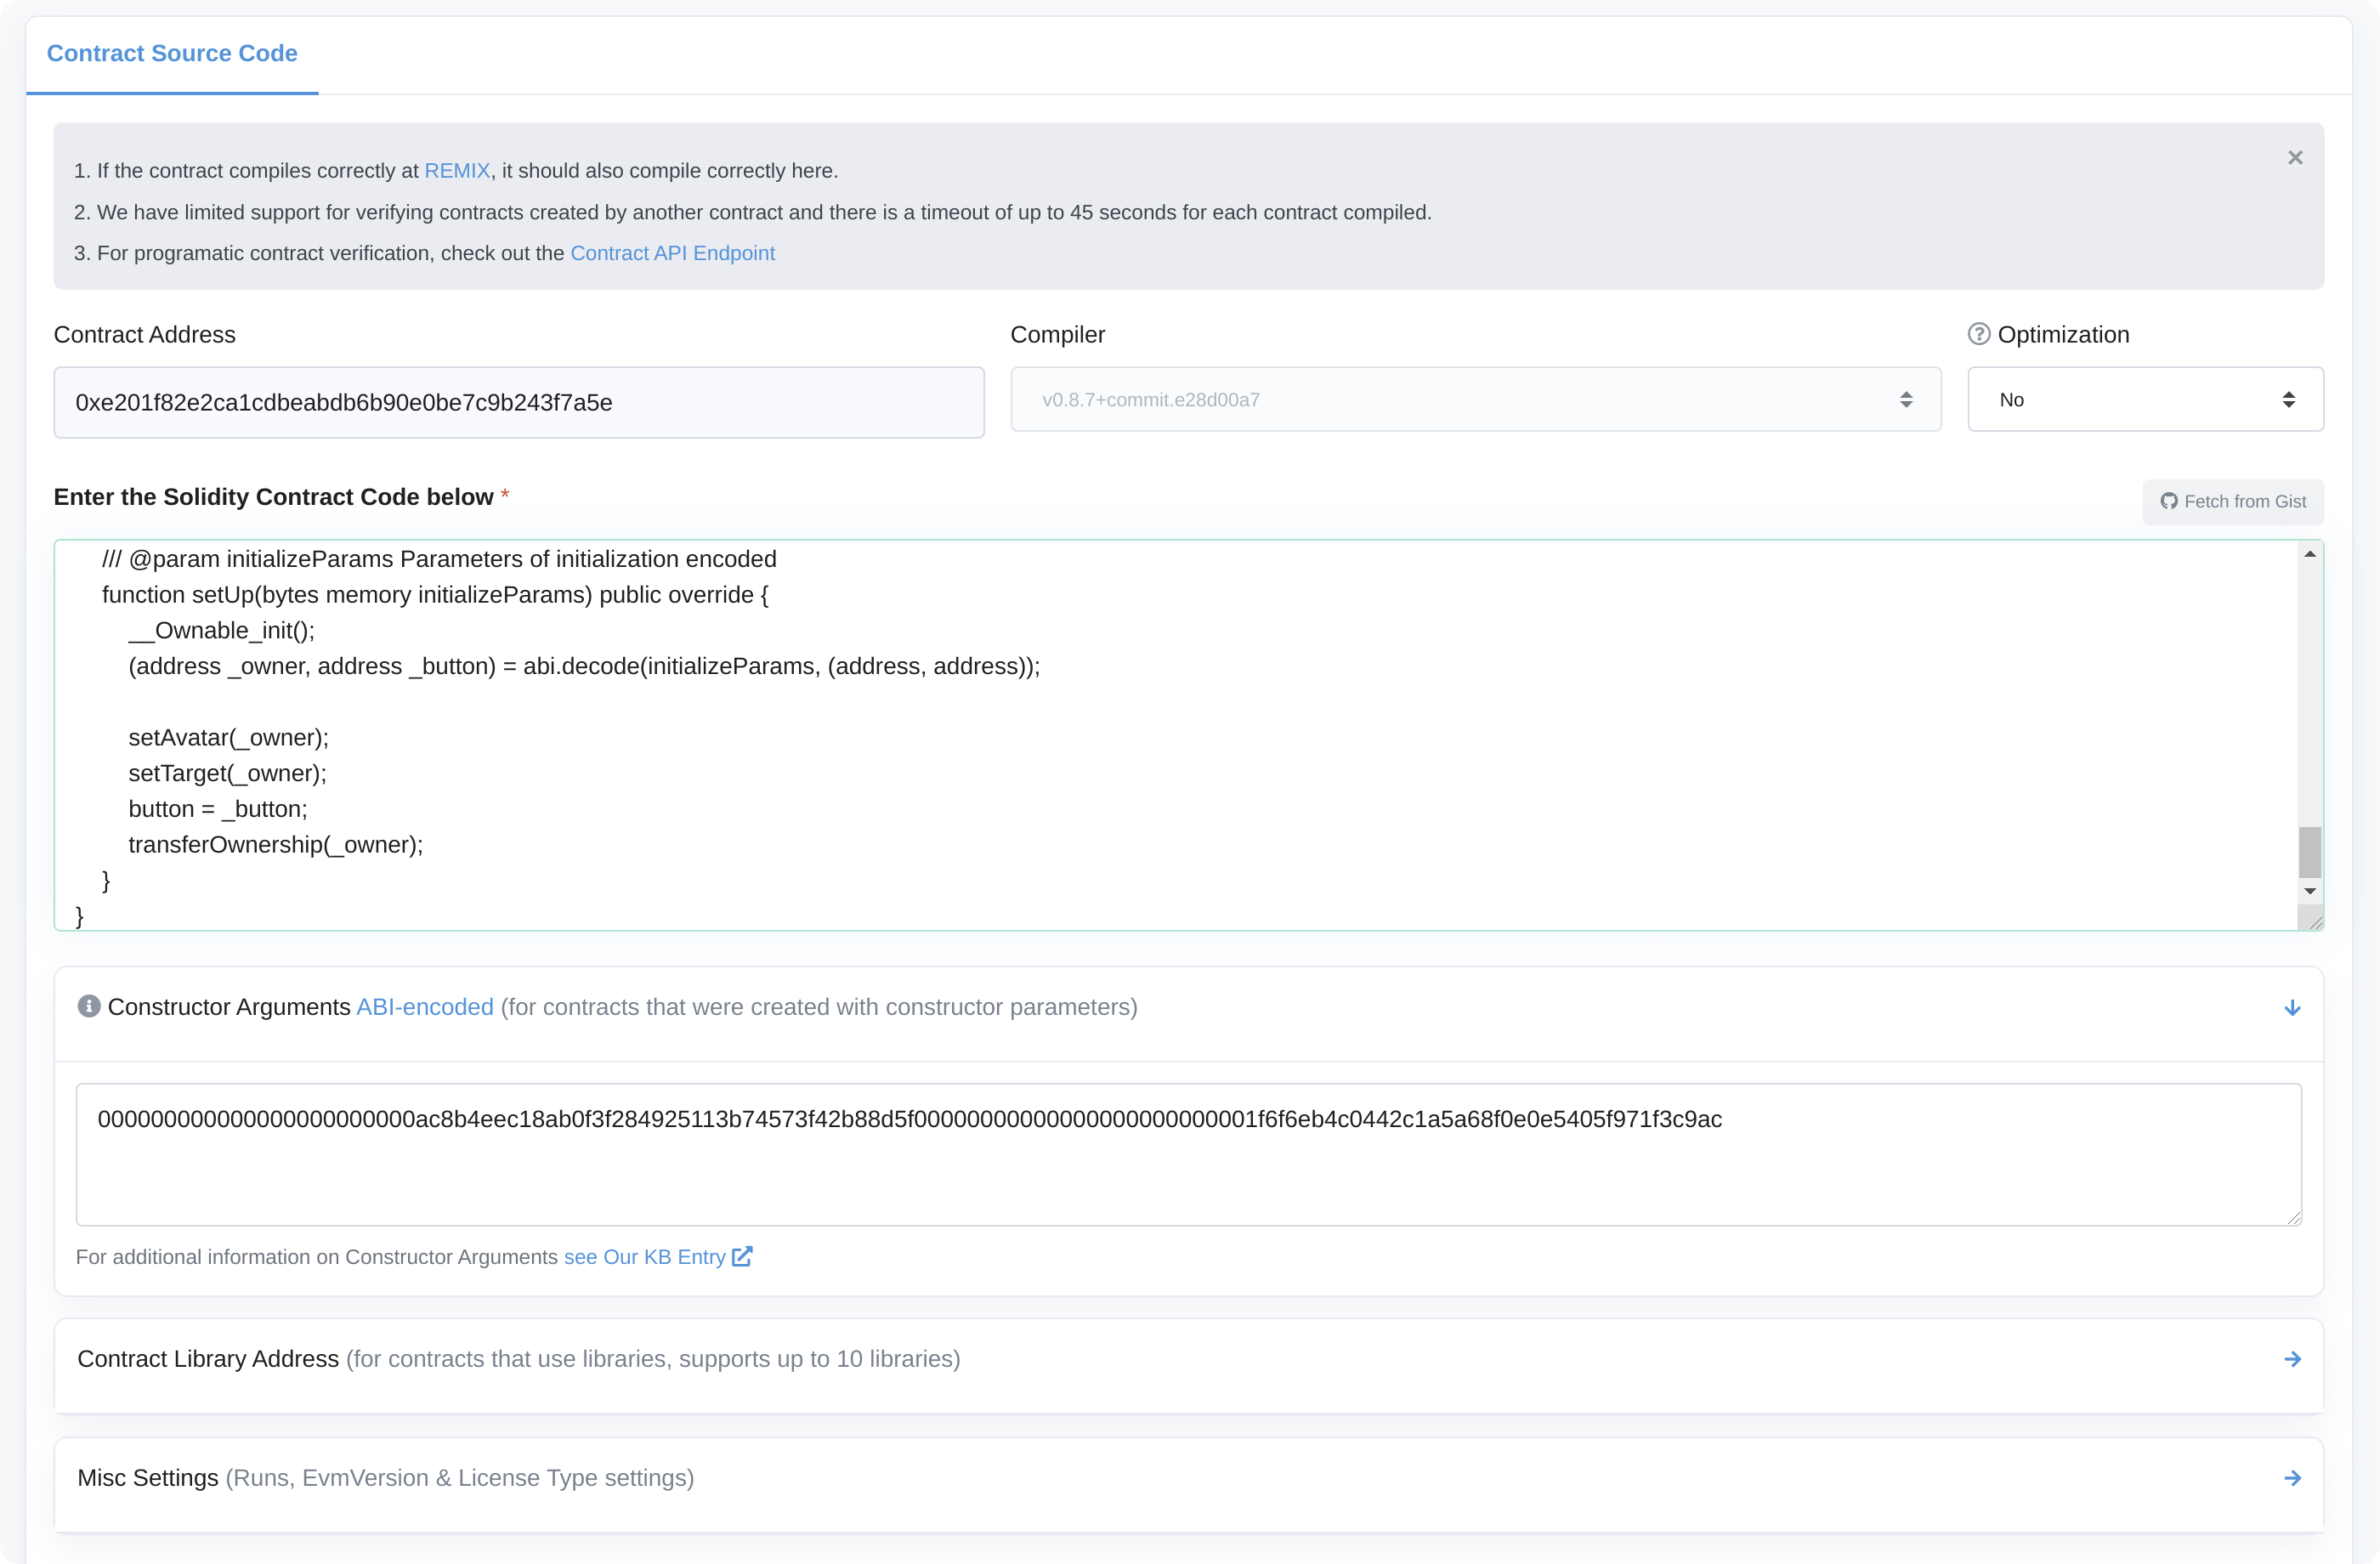
If you want to interact with your module in the Zodiac Safe app, you'll need to verify its source code on Etherscan.
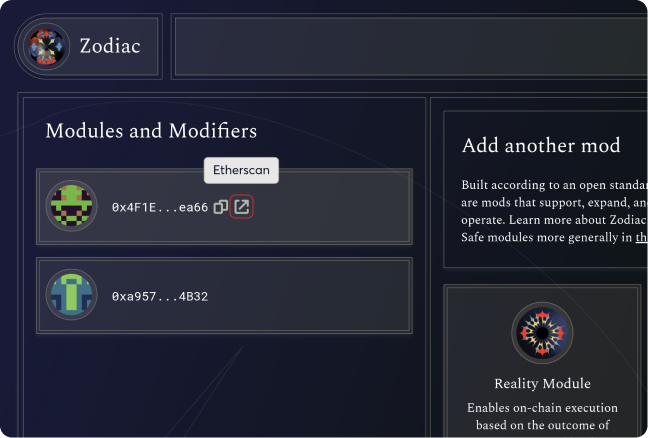
Open your module on Etherscan by clicking the Etherscan button next to your contract's address.
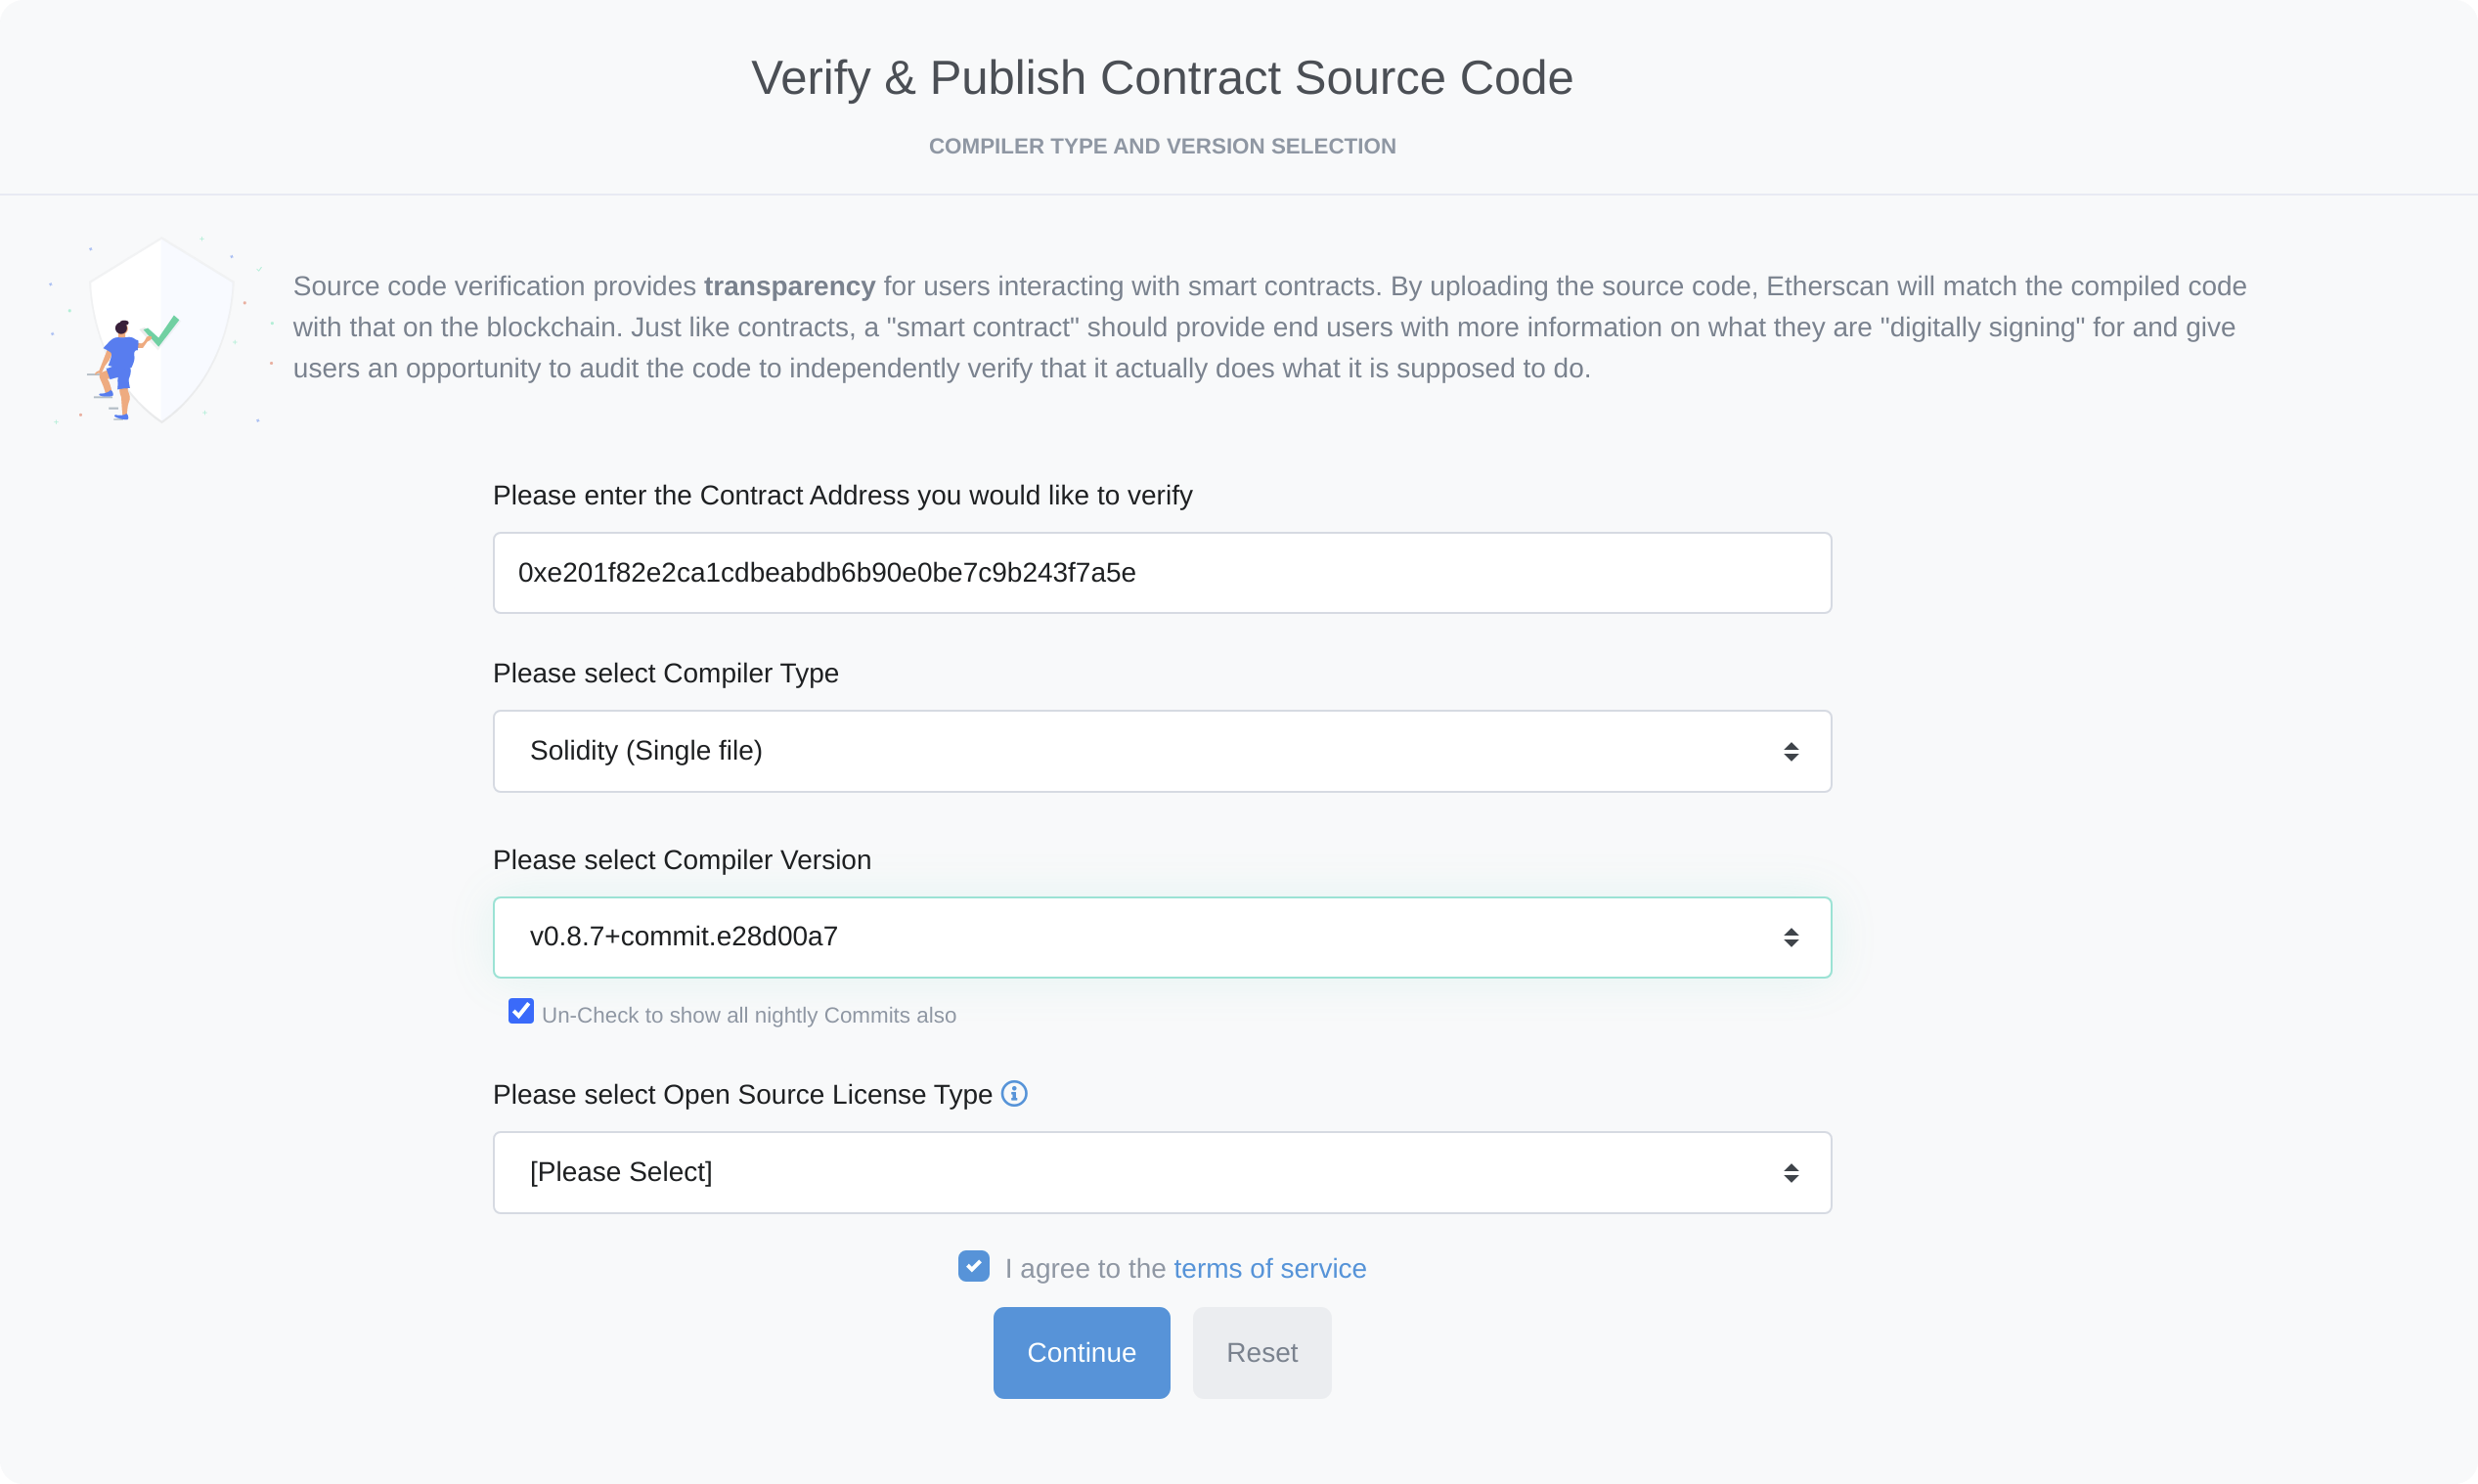
Navigate to the "Contract" tab and select "verify and publish".
Enter your module's address.
Select compiler type "Solidity (single file)".
Select your compiler version, making sure it matches the version selected in the "Solidity Compiler" tab on Remix.
Choose a license and then hit continue.
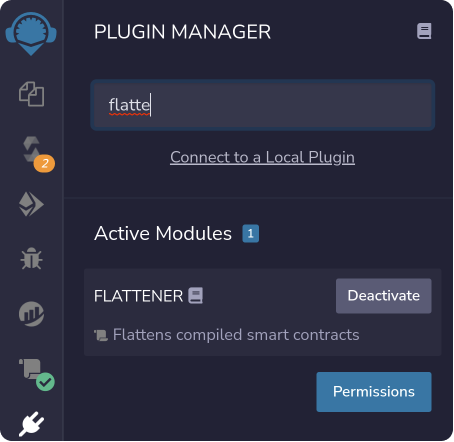
In Remix, add the "Flattener" plugin from the "Plugin Manager" tab.
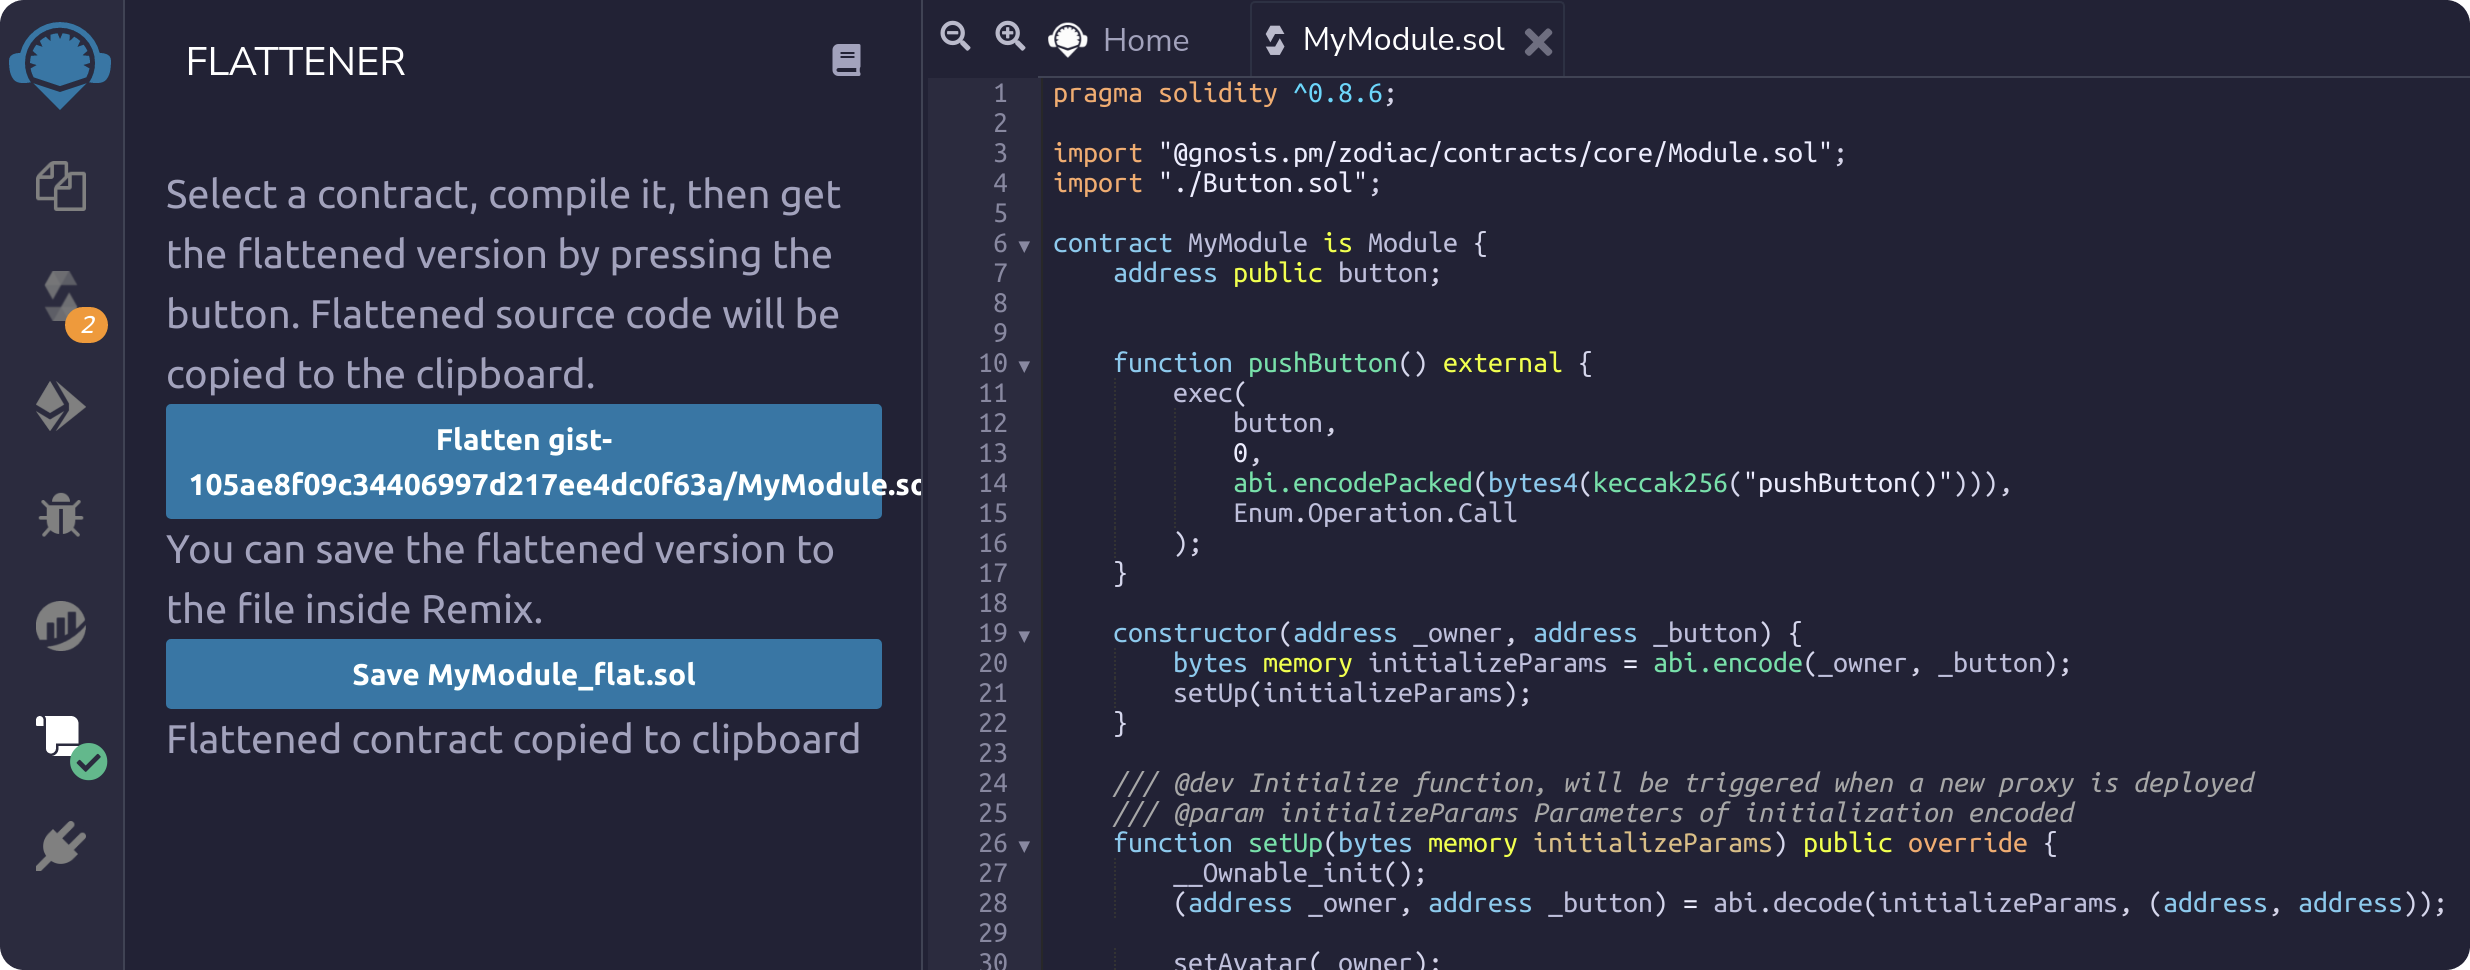
Select "MyModule.sol" and then click the button to copy the flattened code to your clipboard.
Back in Etherscan, paste your flattened code into the text box.
Double check that your optimization settings match what you have selected in the Solidity compiler on Remix.
Then click verify and publish.
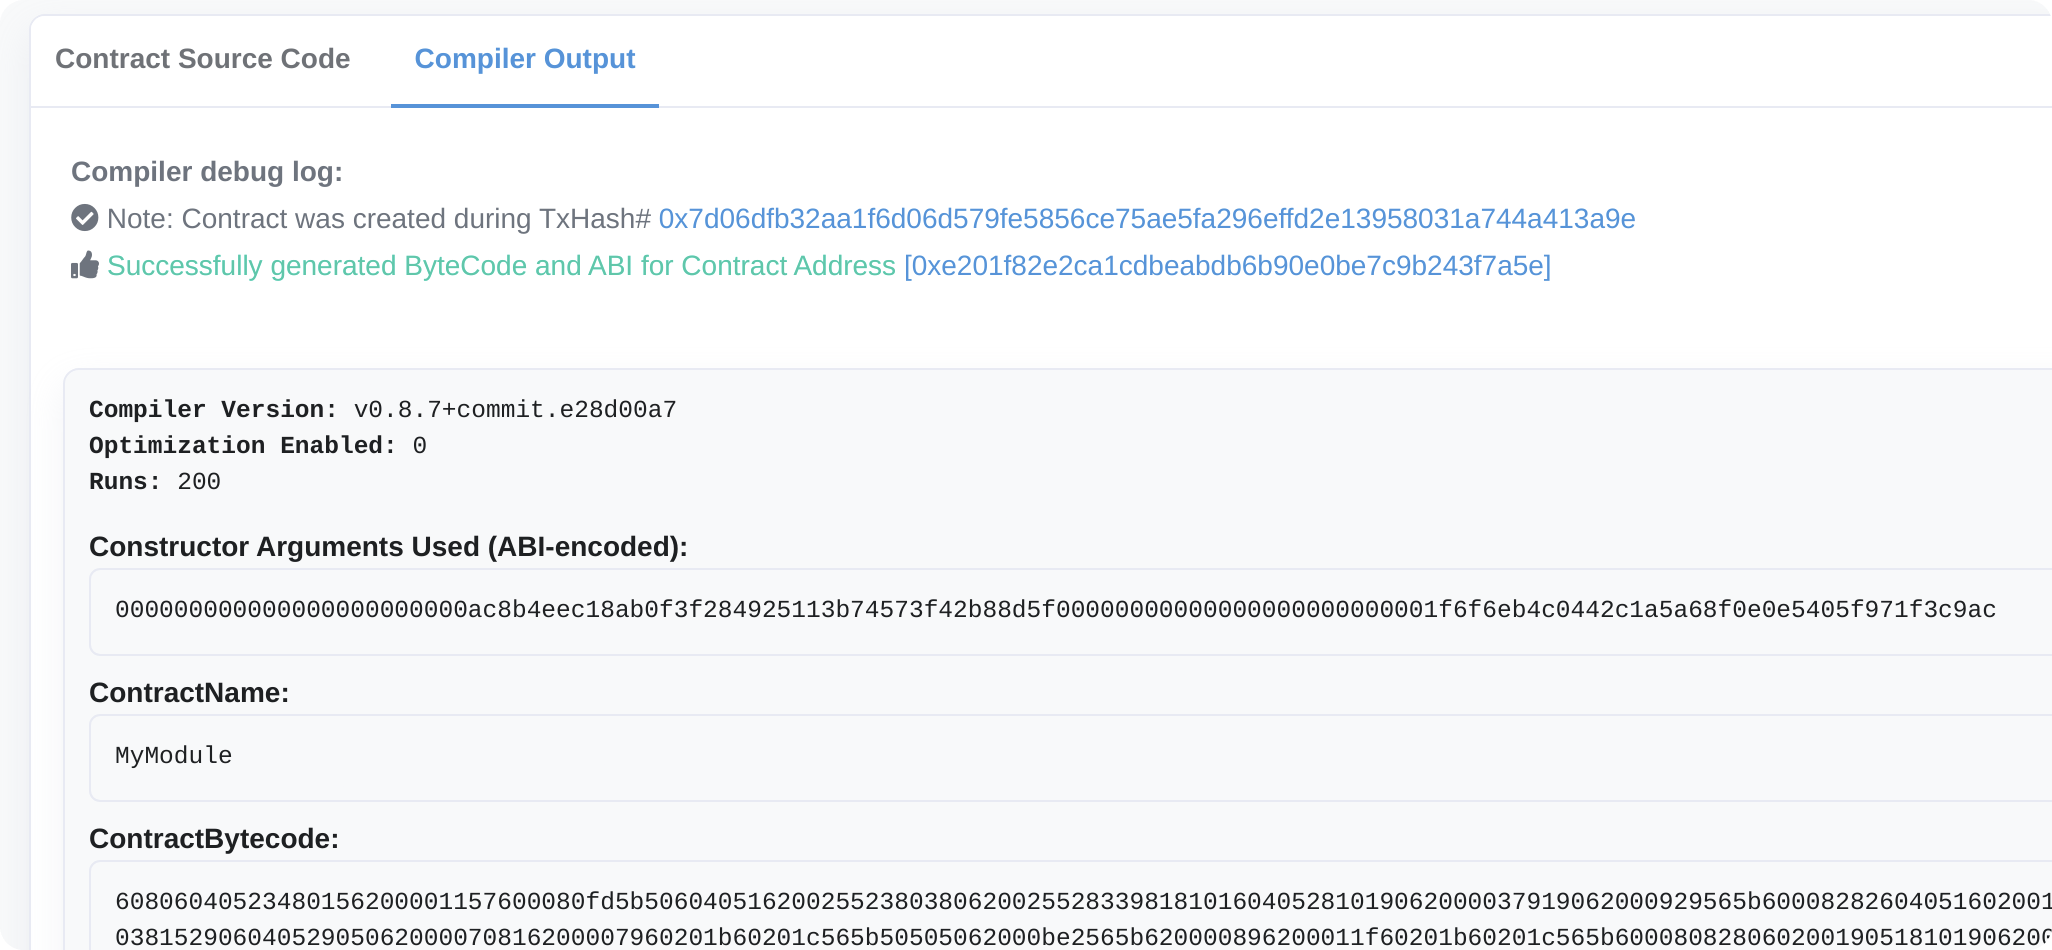
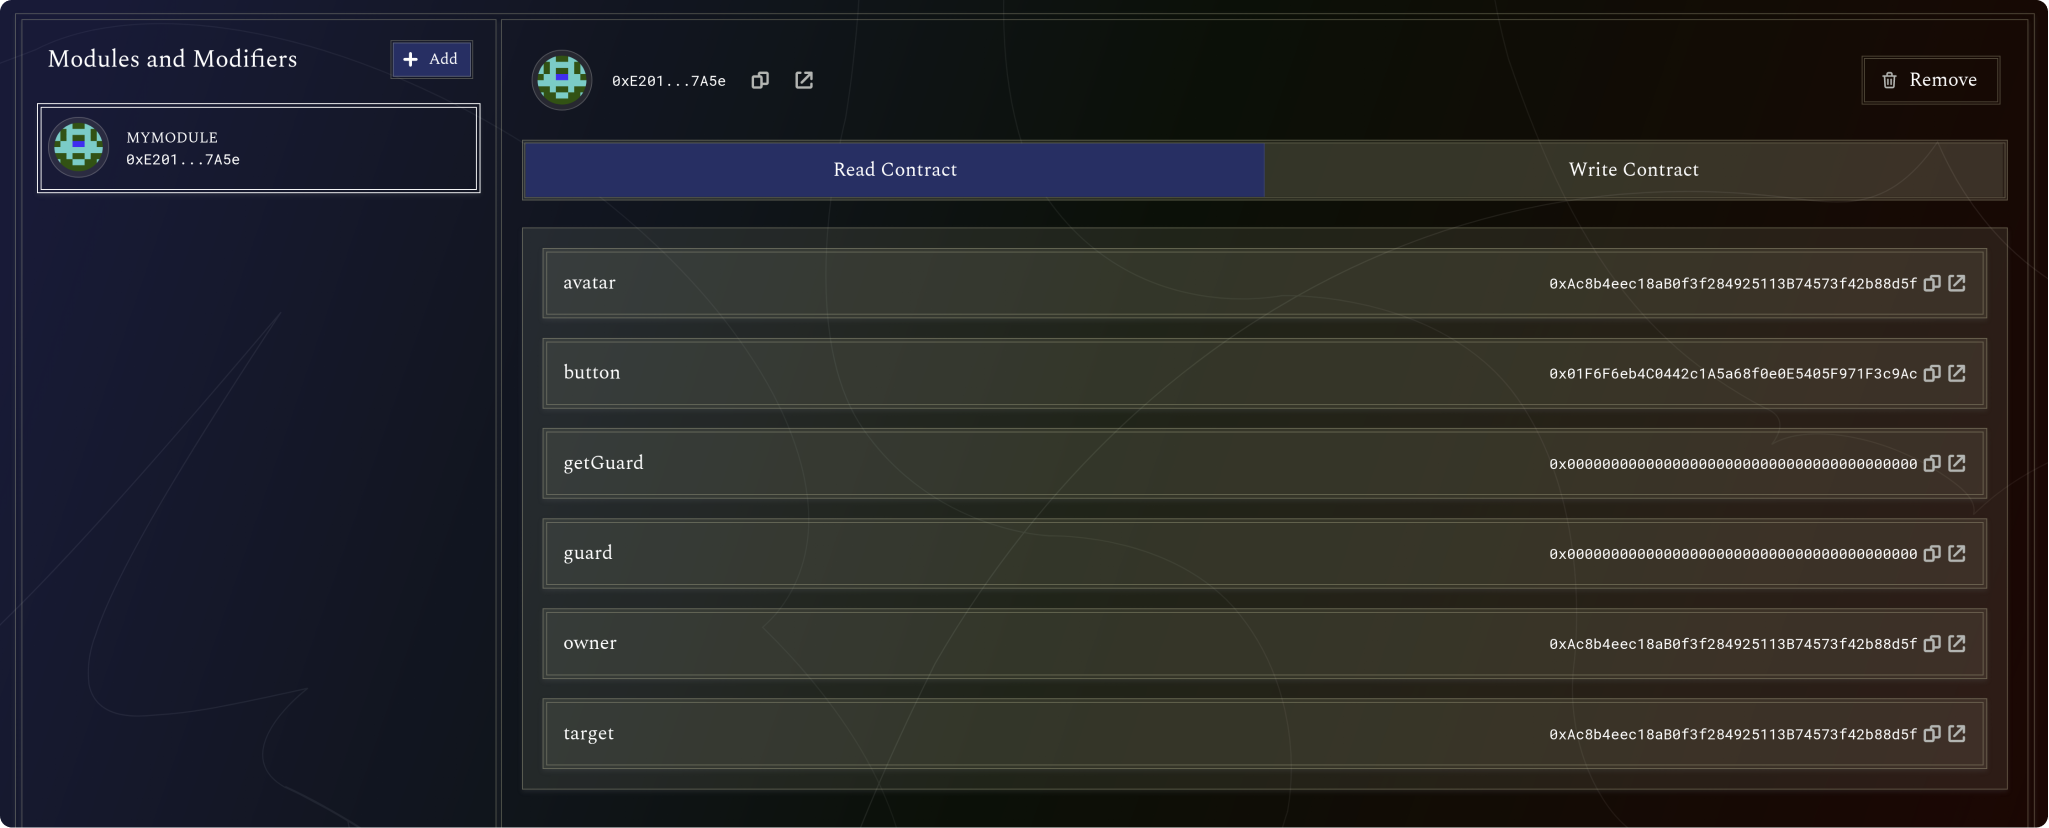
If all goes well, you should see a success screen on Etherscan, and if you refresh the Zodiac app, you should see more details about your Module.
Push the button!
Back in Remix, try pushing the button in your MyModule contract.
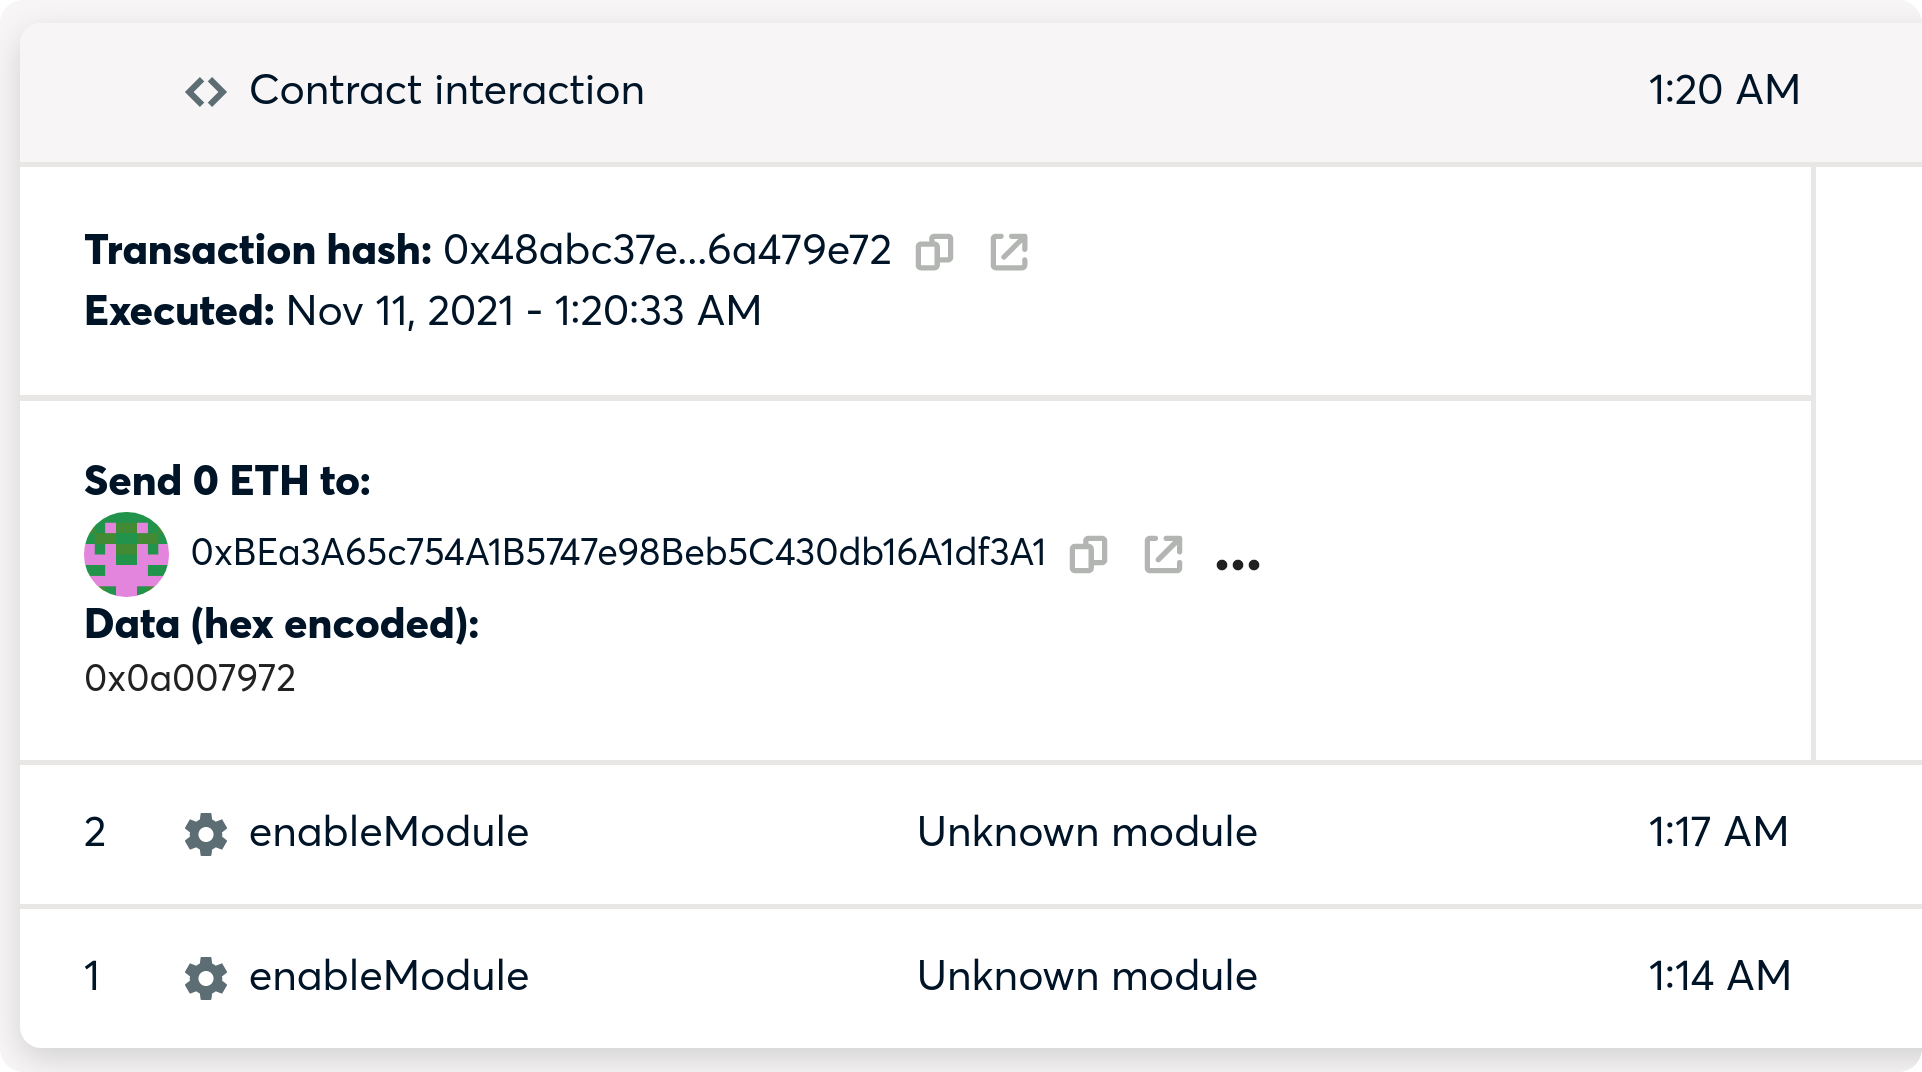
Once that transaction has been confirmed, you should see a new "contract interaction" item in your Safe's transaction history.
Congratulations! You've successfully built a Zodiac module, deployed it to a public test network, and controlled a Gnosis Safe with it.
Questions?
If you need support or have questions about Zodiac, join the Gnosis Guild Discord.
This category currently contains no pages or media.


